We decided to drill a hole in the wall, but do not know for sure where the wiring is located? So, you need to find out the location of the wires before starting work. Better to know for sure than guessing at the coffee grounds.
Why do I need to know the wiring in the house
Often, in the process of repairing a house or apartment, it is necessary to drill a hole in the wall. For example, to fix the crate for drywall. It is sometimes necessary to pave walls to lay water pipes.
Yes, even to just hang a cupboard or any shelf, outweigh a picture or a wall clock - in any case, you need to drill holes in the wall.
At the same time, it is important not to get into the wires in the wall with a drill - this can seriously damage both the wiring itself and the tool, not to mention health. To avoid this, you need to know the wiring diagram of the wiring in the house.

Why is a wire detector needed?
If there is no circuit, then a hidden wiring detector will help to find out how and where the wires are located, so as not to stumble on them during operation. With it, you can accurately determine where the wires are in the wall.
The detectors sold in the store cannot be called budget detectors. But what if you find out the location of the wiring in the apartment is necessary, and the budget does not allow you to purchase an expensive product?
In this case, there is an alternative option - you can make a simple detector for hidden wiring with your own hands. Its manufacture does not take much time or effort, and at the same time helps to save the budget, and also not damage the wires in the wall.

Detector design
The basis for the manufacture of this device, like any other electronic product, is a circuit diagram. Before making a detector for hidden wiring with your own hands, we will understand the circuit of this device.

On the Internet, you can find a large number of various schemes. The scheme presented below is simple, which in turn makes the manufacture of the device easier and more cost-effective.
A small number of components does not always mean poor operation of the device. Quite the contrary, because we all know the simpler the mechanism - the more reliable it is. In our case, the absence of a large number of components will help to avoid difficulties in manufacturing, as well as the subsequent adjustment of the device.
Required Components
- To build the device we need:
- Krone battery with terminal block;
- 1 kΩ resistor
- two-contact button;
- LED of any color;
- 3 bipolar transistors BC547 (or its analogues);
- small cross section copper wire;
- breadboard, electric soldering iron, solder.

How the hidden wire finder works
How does the wiring indicator work? The principle is very simple, and will be clear even to those who are not very versed in radio electronics. All live wires are surrounded by an electromagnetic field. The closer to the wire, the stronger this field.
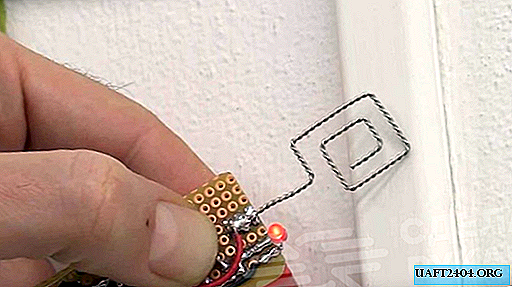
When the antenna of the hidden wiring detector falls into this field, a very weak current appears in it. Accordingly, the closer the antenna to the wire, the greater the current strength arises in it.
The antenna is attached to the base of the bipolar transistor, and, in fact, is a source of control current. The larger the control current, the more the bipolar transistor passes through it.

In turn, the current from the transistor goes to the LED. Several transistors need current to be enough to power the LED. It turns out that the closer the antenna to the live wire is, the brighter the LED lights up.
Below is a video that clearly shows how to make a hidden wiring detector with your own hands. I would like to note some points that it is not advisable to repeat after the author of the video.
It is better to connect the power battery to the board through a dielectric, and, only after all work related to soldering. To connect elements remote from each other, it is better to use jumpers, rather than surfacing with solder. Also, do not forget to degrease all the contacts before soldering - it will be more reliable and durable.

