Share
Pin
Tweet
Send
Share
Send
To make all the bookmarks we need:
- - Tab "Cat's foot" (white cardboard, scissors, glue, pencil, pink felt).
- - Bookmark "Line Index" (scrapbook paper or plain cardboard, scissors, thin rubber, cutter, pencil).
- - Bookmark "Cup of tea" (color cardboard (white and brown), tea bag, glue, scotch tape, scissors, pencil, felt-tip pen).
- - Tab "Cat" (white cardboard, glue, scissors, felt-tip pen, pencil).
Cat Foot Bookmark
Step 1. On a white cardboard we draw a cat's foot (9.5 cm high and 2.5 cm wide). If desired, the color of the cardboard can be any, for example, gray, orange, black.
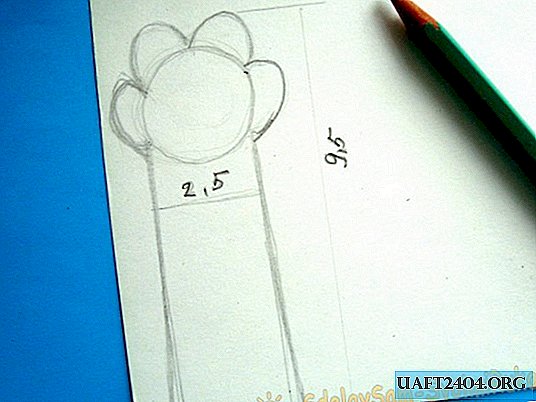
Step 2. Cut along the contour. Now make soft pads on the foot. From pink felt, we cut out four small circles and another one a little larger. Thanks to felt, the paws will look soft and voluminous.

Step 3. Glue the pink blanks to the foot.

Step 4. It remains to put a bookmark in the book and you're done!

Stitch Index Tab
Step 1. From a scrapbook paper or ordinary color cardboard, cut a small rectangle.

Step 2. On the reverse side, draw an arrow (length 4 cm, width 1.5 cm) and cut it out. To make the arrow look neater, slightly round its edges.


Step 3. Using the cutter, carefully make two small cuts along the arrow, then thread the elastic as shown in the photo.

Step 4. In order not to miscalculate the size of the elastic, put it on the book and tie it on a knot (cut the unnecessary ends of the elastic). The gum should sit tight.

Step 5. It remains to put a bookmark on the book and enjoy reading. The advantage of the pointer - the arrow is that it can be moved and thereby you can find the page where you stopped, right down to the line.

Cup of tea bookmark
Step 1. On a white cardboard we draw a cup of tea (4.5 cm high and 4.5 cm wide) and cut along the contour.


Step 2. Next, on a brown cardboard we draw a small oval, with the help of it we will depict as if tea was poured in our mug. Glue the blank to the mug. Let's make the mug more expressive, for this we will circle it along the contour.

Step 3. Next, tear off the tag from the tea bag - the label (along with the thread). Then glue it on the back of the cup with tape.

Step 4. It remains to put a cup in the book, and leave the label - a label on the outside.

Tab "Cat"
Step 1. On a white cardboard we draw a cat (length 12 cm, width 4.5 cm). We draw a muzzle, ears and paws. The paws should be at least 3 cm long, otherwise the bookmark will not hold well. Cardboard can be taken in any color you wish.

Step 2. Using scissors, cut along the contour of our cat. Paws are cut out, not reaching the end.

Step 3. Then paint our cat. We outline a black felt-tip pen along the contour and draw a muzzle. Using a pink pencil, make a blush and color the ears so that the cat looks even nicer. You can also draw various patterns, stripes, spots.

Step 4. We hook the paws to the page. Now, when you open the book you will have fun meeting a cute cat.

These are the bookmarks we got! They look interesting, beautiful, unusual and most importantly they are very comfortable. Now even the most boring textbook will be more fun to read for a student!

Share
Pin
Tweet
Send
Share
Send

