Share
Pin
Tweet
Send
Share
Send
For work, you will need clothes (in our case, a white cotton T-shirt). Actually it can be a simple monophonic thing. The fabric material can be not only cotton, but also some other. Also, for work, you need to choose a harmonious pattern. It can be printed and then transferred to a fabric using carbon paper or immediately drawn onto fabric, it depends on the ability to draw. In any case, for convenience, it is better to put something solid or at least cardboard under the painted fabric. This is necessary first of all for the convenience of drawing, and secondly, so that when applying colors they do not leak on the back of the t-shirt. Accordingly, you will need paint for the fabric. They are different depending on the planned material. In any case, neither gouache nor any other paint will work. Only special for fabric. You can buy them in specialized stores for creativity. When all the materials and tools are prepared, you can begin to work.
In this workshop, a white cotton T-shirt with a dragon pattern will be painted. The dragon has green, orange, yellow and black colors. To get started, transfer the pattern to the fabric using carbon paper. Putting a T-shirt on a wooden stool, putting a cardboard under the front, put a printed picture with a carbon copy attached and proceed with the translation. Due to the fact that the fabric itself is soft, then you need to transfer to it with a blunt pencil, and not with a sharp pen, because otherwise the paper will simply tear, and the pattern on the fabric will not work.
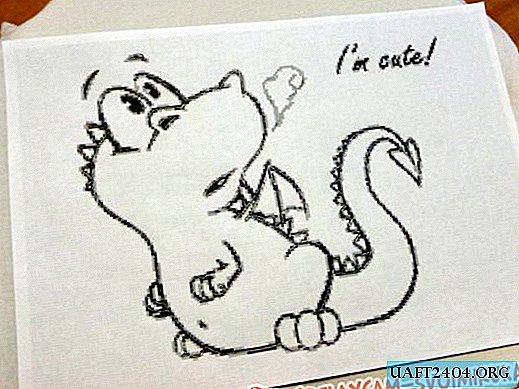
When translating, you should put a lot of pressure on the lines so that they are accurately imprinted, you should not rush, otherwise you will have to draw a lot and adjust by hand with a pencil.

After the pattern is transferred to the fabric, carefully and gradually remove the pattern and carbon paper from the fabric. It is best to alternately raise the edges and see if all the basic elements are translated. If not, then you need to return the drawing back and circle the untranslated elements again, pressing the pencil harder. It is because of the need for this operation that it is better not to completely remove the entire pattern, but only to raise the edges. When all the basic elements have been translated, you need to bring to the completion of the small details. No matter how good and strong the pressure on the pencil, small lines may still not be completed. In such a situation, it is necessary to carefully draw all the lines with a simple pencil, thereby bringing the drawing to its logical end.

The next step will be drawing a contour of the picture. This can be done with either contour paints or regular fabric paints. The differences in them are insignificant, and the choice is left to the master. In this master class, 3D contour paints for fabric were used, but they were applied with a brush so that there was no 3D effect (it was inappropriate). Paint should be applied with a thin brush, gently and slowly. Wrong strokes will be very difficult to clean.

Before continuing to apply paint, it is necessary that the circuit dry thoroughly. When it has dried, then you can continue to work. It is necessary to gradually paint the drawing like a coloring. It is best to decorate on the basis of the choice of color, not elements. In this master class, after the contour, orange paint is applied to all parts that include this color.

Before applying the next color, it is always necessary to let the previous color dry or at least dry. After the orange color, apply yellow. Do not forget to thoroughly rinse the brush when changing colors. If this is not done, then a dirty and ugly color can turn out.

In the same way we apply all colors. If you do not have the required color in the assortment, then you can always resort to mixing. To obtain lighter tones, you can use a special thinner, which is sold in the same stores where the paint itself. It is worth remembering that when diluted, the paint becomes more fluid and can stick to the attached cardboard (and if it does not, then leak to the back). After applying all the paints, we give the entire drawing to dry thoroughly.


Drying time depends on the fabric and dyes that are used. On average, the paint dries within 24 hours. Special instructions will always be written on the box or in cans of paint. After the T-shirt has dried thoroughly, you need to carefully remove the cardboard. Do not pull it strongly or pull it out, because the paint could leak a bit and stick. After the paint has dried, the T-shirt is ready and can be worn.

It will take a couple of days to decorate a regular T-shirt in time. But for small labor and money costs you will get an original and unique thing.
Share
Pin
Tweet
Send
Share
Send

